[ad_1]
Clear ice cubes make for cocktails that look and taste better! Here’s our tried and true method for how to make clear ice.

Looking for how to make clear ice for cocktails? You’ve come to the right place. We’ve spent hours researching the best way to do it, and found an easy method that works every time. Here’s exactly what you need to do to make the beautiful, crystal clear ice sphere you see in that cocktail glass above.
Why to make clear ice
Why spend the time making clear ice? This simple trick can make your cocktails look like they were crafted in a fancy bar. The glistening artisanal ice cubes are incredibly beautiful to look at, and make any cocktail look simply stunning. It’s the perfect party trick to impress your guests: and they’ll feel like 1 million bucks drinking it. The top reasons to make clear ice are:
- Clear ice looks beautiful in a glass. You can cut it into large, organic shapes that are perfect for an Old Fashioned or for filling up a glass for a margarita on the rocks.
- Clear ice melts slower. The purer the ice, the less fast it melts. So clear ice keeps the drink cold without diluting it as fast as cloudy ice.
- Clear ice makes carbonated drinks fizz less than cloudy ice does. Fizzy drinks taste better because more of the bubbles are preserved.
How to make clear ice: a tutorial
Here’s the basic idea behind how to make clear ice. Standard cloudy ice cubes are frozen from all sides at the same time. This results in uneven freezing, which makes less perfect ice formations and traps all air and particles in the center of the cube. For clear ice, the water must be frozen directionally, from the top down, allowing the ice to form pure crystals. You can do this by freezing water in a small cooler instead of an ice tray. All of the dissolved air and particles end up in the water beneath the ice block.
Step 1: Freeze warm water in a cooler for 18 to 24 hours.
Find a small cooler that fits inside your freezer. Then fill the cooler with 4 to 5 inches of warm tap water (not hot!). Place the cooler inside your freezer with the lid off. Freeze the cooler for 18 to 24 hours until several inches of the water have frozen. You’ll want to still have some water left under the ice, which prevents the ice from getting cloudy.
Here’s what it will look like at this point. You’ll see that our ice does have a few crystals on the outside edge: you can discard anything that’s too frosty.

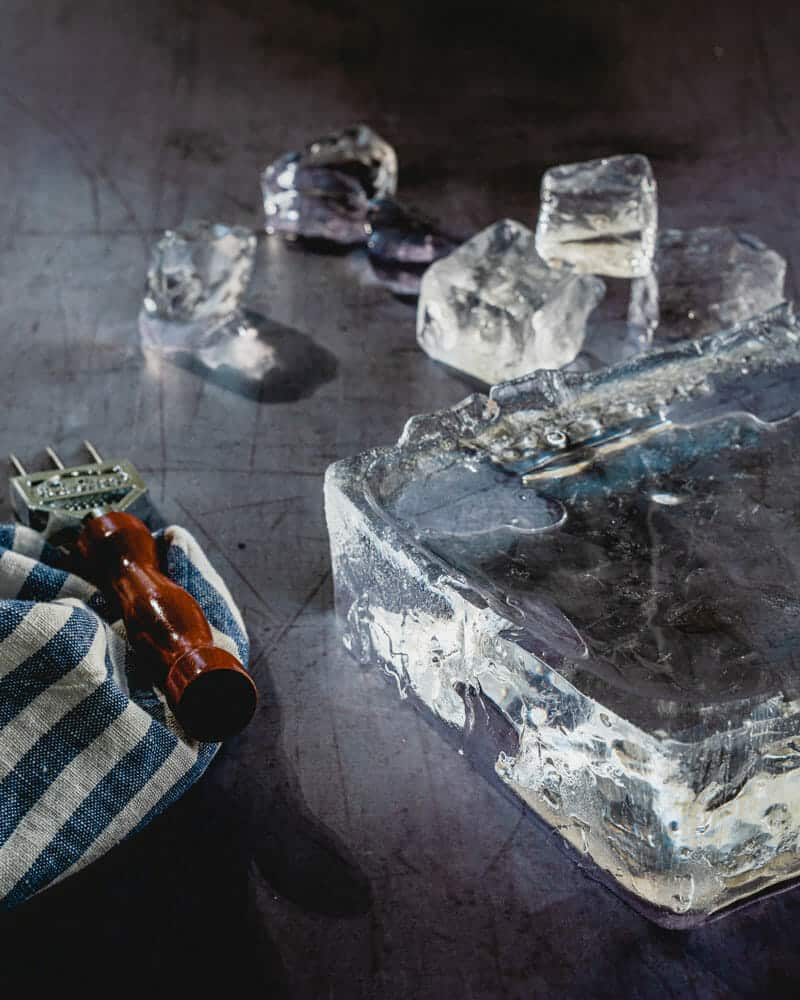
Step 2: Remove the ice from the cooler.
When the block ice is ready, remove it from the cooler to get ready to get it into cubes. To do so, place the cooler upside down in the sink for 5 to 10 minutes. The ice block may fall out on its own. Or, give it a gentle shake to pop it out of the cooler.
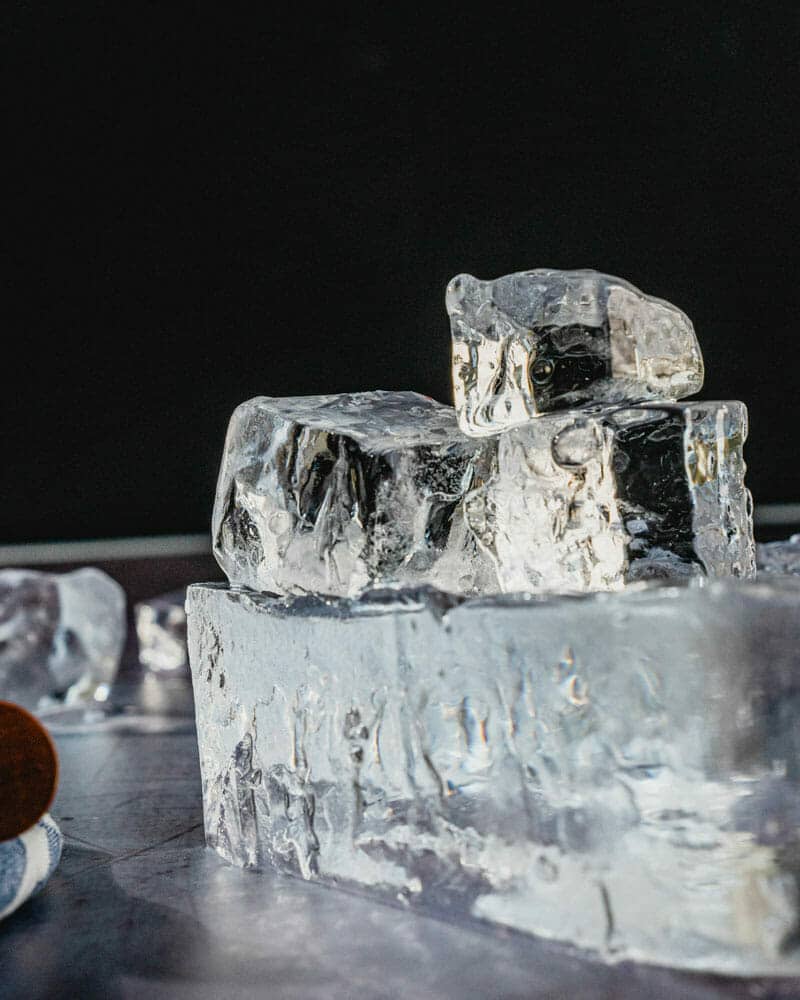
Step 3: Cut the ice into cubes with a serrated knife.
Here’s where it gets fun! Use a serrated knife to cut the ice into the desired size of chunks. It will be less about cutting and more about scoring the ice so that it snaps off. Here’s what to do:
- Hold the ice with a towel or oven mitt.
- Cut out a strip of ice by lightly scoring the top of the ice with a serrated knife, then sliding the knife back and forth until a strip of the ice snaps off.
- Use the same scoring method to cut the strip into cubes.

Step 3: Shape the clear ice chunks with an ice pick (optional).
For any ice you plan to serve right away, you can use an ice pick to hone the final shape. This is optional, but if you have time you can use a pick to hone the shape into a sphere or to simply fit it into the glass. See the section below on shaping ice.

Step 4: Store the clear ice.
Store any ice you’re not planning to use immediately in the freezer in a closed container or freezer-safe bag, where it keeps indefinitely.
Important: Before using the frozen ice in a drink, allow the ice cube to sit at room temperature to temper it for 2 minutes. This tempers the ice and prevents cracking. It also allows the outer layer (and any freezer burn) to melt off of the ice.
Or, use a clear ice tray!
Don’t want to bother with the cooler method? There’s (finally) an invention for that: a clear ice maker! We bought this ClearlyFrozen Home Clear Ice Tray to test it against our homemade method. It works great!
It’s just as easy to use, and it’s smaller than the cooler so it easily fits in the freezer. The only drawback is that it makes cubes, not large sheets you can cut into organic shapes. which is what we prefer for our cocktails.

Cocktails made better with clear ice!
Ready to serve your clear ice? So many great cocktails are made better with a cube of clear ice in the glass. Here’s a list of cocktails we’ve made lately and photographed using clear ice (click over to see the photos):
- Margarita on the rocks
- Whiskey Sour
- Old Fashioned
- Negroni
- Gin and Tonic
- Tom Collins
- Paloma
- Aperol Spritz
- New York Sour or Amaretto Sour
- White Russian
- Sea Breeze
- Salty Dog
Tips on how to shape clear block ice
For the purposes of this article, anything goes with shaping your ice! It’s definitely an art form that some bartenders take to a very high level. This method is intended for home cooks who want to up their cocktail game, so we won’t provide an in-depth ice shaping resource. However, here are a few tips:
Troubleshooting clear ice: what if it doesn’t turn out perfectly clear?
Many online sources recommend using distilled, filtered, or boiled water in ice cube trays. Alex and I tested all of these methods, and here’s what we found: generally, this will not result in fully clear ice! So luckily, you don’t have to bother with this.
That said: if for some reason you don’t get perfectly clear ice using our method, you can experiment with filtered or boiled (and cooled) water in the cooler! This may reduce dissolved air or particulates.
Description
Clear ice cubes make the most impressive cocktails! After lots of research, we found the very BEST method for how to make clear ice. Note: This results in large chunks of ice. If you’re interested in making clear ice cubes, see the section above.
- Small cooler that fits in your freezer*
- Warm tap water
- Freeze the ice (24 hours): Fill the small cooler with 4 to 5 inches of warm tap water (making sure it is not hot). Place the cooler in the freezer with the lid off. Freeze for 18 to 24 hours until several inches have frozen. You’ll want to still have some water left under the ice (this prevents the ice from getting cloudy).
- Remove the ice: Place the cooler upside down in the sink for 5 to 10 minutes. Then gently shake the ice block out (or it may fall out on its own).
- Cut the ice into cubes: Place the ice block on a cutting board. Then use a serrated knife to cut the ice into the desired size of chunks by doing the following: Hold the ice with a towel or oven mitt and lightly score the top with the knife until a strip of the ice snaps off. Then cut that strip into cubes.
- Shape with ice pick (optional): If you’d like, you can use an ice pick to hone the final shape (see the section above).
- Store the ice: Store the ice in the freezer in a closed container. Before using the ice in a drink, allow the ice cube to sit at room temperature to temper it for 2 minutes to prevent cracking. Tempering the ice also allows the outer layer (and any freezer burn) to melt off of the ice.
Notes
*You can also use this Clear Ice Maker, which creates large clear ice cubes. Follow the package instructions.
Method adapted from Alcademics
- Category: Drinks
- Method: Frozen
- Cuisine: Cocktails
Keywords: How to make clear ice,
[ad_2]
Source link